使用istio对spring cloud kubernetes项目进行金丝雀发布
用istio来部署spring cloud kubernetes果然名不虚传.istio对spring cloud实现灰度发布、蓝绿部署、金丝雀部署
本系列文章目录
- (一)基础k8s yaml脚本发布
- (二)helm+shell脚本优化大量冗余配置发布
- (三)jenkins用户审核的流水化方式部署
- (四)service mesh(istio)服务网格化发布
- (五)istio对项目进行金丝雀部署
其他相关文章
- spring-cloud-kubernetes之开发环境搭建
- spring cloud项目改造为spring-cloud-kubernetes项目
- 使用istio对spring cloud kubernetes项目进行金丝雀发布
前言
上一篇文章《spring cloud项目改造为spring-cloud-kubernetes项目》以开源的spring-boot-cloud项目为例分享了如何将一个传统的spring cloud项目换成spring cloud kubernetes项目,同时还演示了改造后中的Hystrix熔断、本地服务调用本地服务、fabric8插件一键部署等功能。
这一篇为是对之前的文章《采用rancher2+kubernetes+skywalking部署springcloud项目(五[istio蓝绿部署]-错误演示)》的一个后续,上次因为项目全采用的spring cloud原生组件来实现的微服务,但将项目部署到istio时因为原来spring cloud组件与istio中部分组件的冲突导致没能将蓝绿部署演示成功。但目前原来的spring-boot-cloud项目中的组件已经用spring cloud kubernetes替换掉了,所以这里决定再次进行尝试用istio来演示如何进行金丝雀/灰度发布
对于istio的环境的搭建直接参考之前的文章即可
部署改造后的spring-boot-cloud项目
这次仅部署config、gateway、svca-service、svcb-service,访问gateway项目会调用svca-service,svca-service又会调用svcb-service
其部署文件如下:
#-------------config-----------------
---
apiVersion: apps/v1
kind: Deployment
metadata:
  name: config
spec:
  replicas: 1
  selector:
    matchLabels:
      app: config
  strategy:
    rollingUpdate:
      maxSurge: 1
      maxUnavailable: 0
    type: RollingUpdate
  template:
    metadata:
      labels:
        app: config
    spec:
      containers:
        - image: ccr.ccs.tencentyun.com/spring-boot-cloud/config:v3
          imagePullPolicy: Always
          name: config
          ports:
            - containerPort: 30876
              protocol: TCP
---
apiVersion: v1
kind: Service
metadata:
  name: config
spec:
  ports:
    - name: http
      port: 30876
      protocol: TCP
      targetPort: 30876
  selector:
    app: config
#-------------svca-service-----------------
---
apiVersion: apps/v1
kind: Deployment
metadata:
  name: svca-service
spec:
  replicas: 1
  selector:
    matchLabels:
      app: svca-service
  strategy:
    rollingUpdate:
      maxSurge: 1
      maxUnavailable: 0
    type: RollingUpdate
  template:
    metadata:
      labels:
        app: svca-service
    spec:
      containers:
        - image: ccr.ccs.tencentyun.com/spring-boot-cloud/svca-service:v3
          imagePullPolicy: Always
          name: svca-service
          ports:
            - containerPort: 8080
              protocol: TCP
---
apiVersion: v1
kind: Service
metadata:
  name: svca-service
spec:
  ports:
    - name: http
      port: 8080
      protocol: TCP
      targetPort: 8080
  selector:
    app: svca-service
#-------------svcb-service-----------------
---
apiVersion: apps/v1
kind: Deployment
metadata:
  name: svcb-service
spec:
  replicas: 1
  selector:
    matchLabels:
      app: svcb-service
  strategy:
    rollingUpdate:
      maxSurge: 1
      maxUnavailable: 0
    type: RollingUpdate
  template:
    metadata:
      labels:
        app: svcb-service
    spec:
      containers:
        - image: ccr.ccs.tencentyun.com/spring-boot-cloud/svcb-service:v3
          imagePullPolicy: Always
          name: svcb-service
          ports:
            - containerPort: 8070
              protocol: TCP
---
apiVersion: v1
kind: Service
metadata:
  name: svcb-service
spec:
  ports:
    - name: http
      port: 8070
      protocol: TCP
      targetPort: 8070
  selector:
    app: svcb-service
#-------------gateway-----------------
---
apiVersion: apps/v1
kind: Deployment
metadata:
  name: gateway
spec:
  replicas: 1
  selector:
    matchLabels:
      app: gateway
  strategy:
    rollingUpdate:
      maxSurge: 1
      maxUnavailable: 0
    type: RollingUpdate
  template:
    metadata:
      labels:
        app: gateway
    spec:
      containers:
        - image: ccr.ccs.tencentyun.com/spring-boot-cloud/gateway:v3
          imagePullPolicy: Always
          name: gateway
          ports:
            - containerPort: 8060
              protocol: TCP
---
apiVersion: v1
kind: Service
metadata:
  name: gateway
spec:
  ports:
    - name: http
      port: 8060
      protocol: TCP
      targetPort: 8060
  selector:
    app: gateway
---
如果启动时发布有权限不足的话,记得给serviceaccount加权限,要不然可能会报下面这样的错误
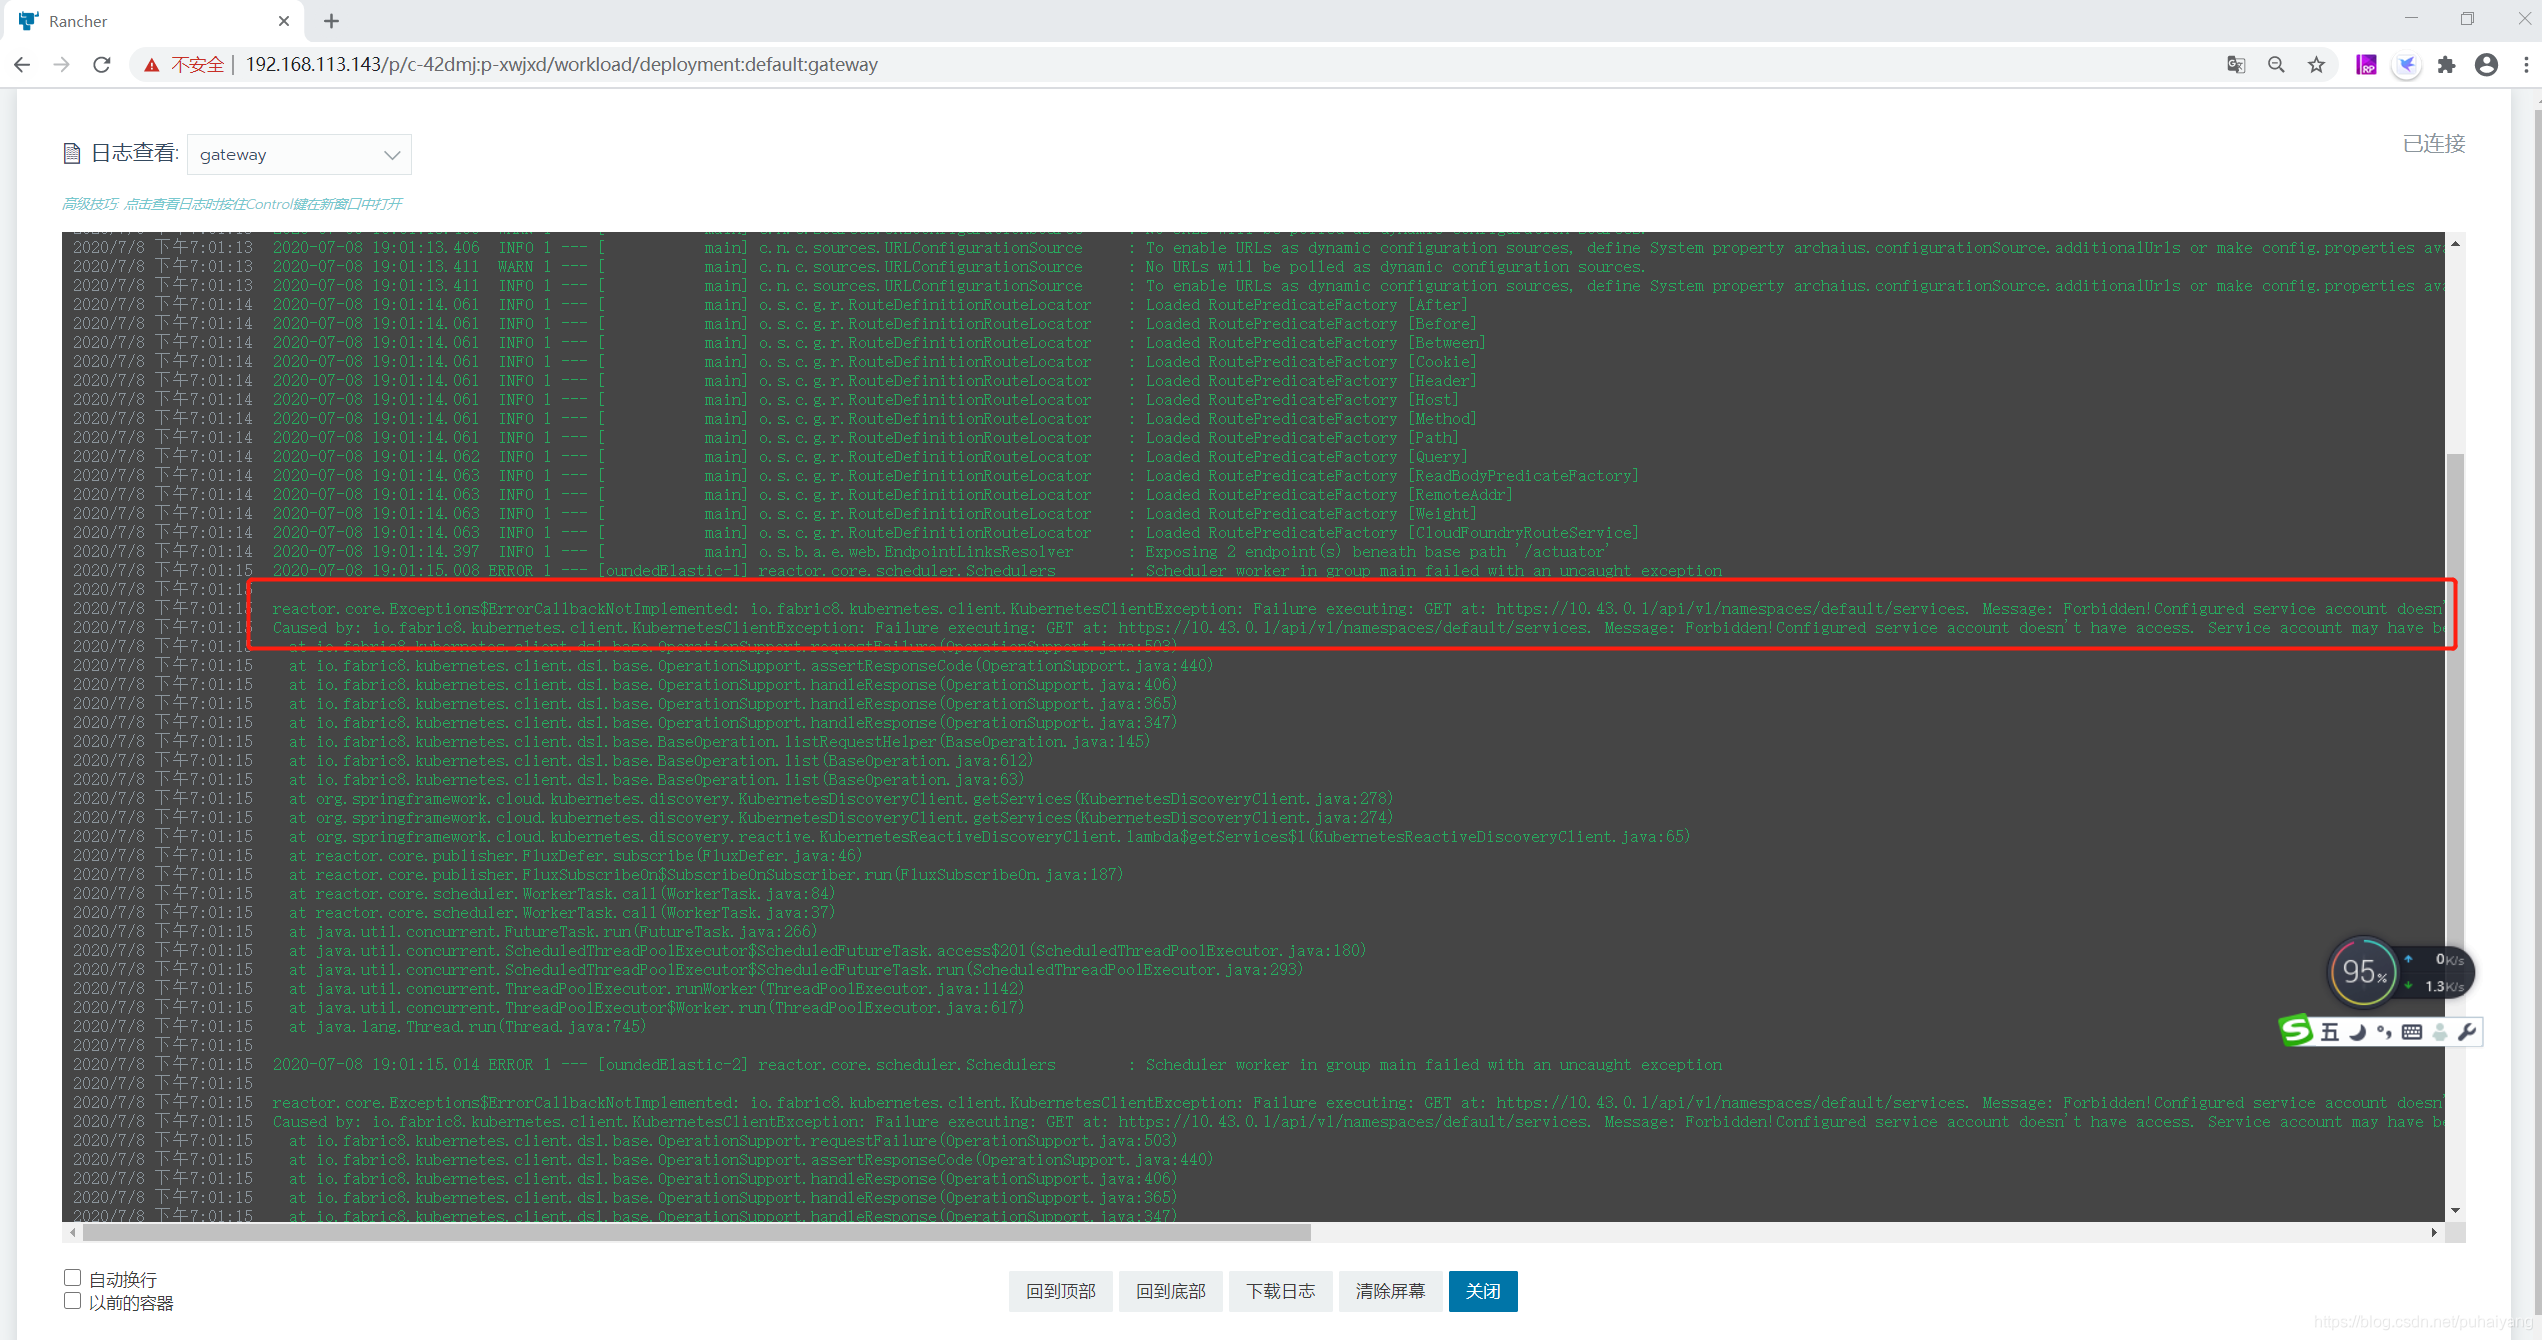
具体的操作方式参考上一篇文章中k8s rbac部分
部署好了项目之后,接着添加virtualservice和gateway,以访问gateway项目
apiVersion: networking.istio.io/v1alpha3
kind: Gateway
metadata:
  name: gateway-gateway
  namespace: istio-system
spec:
  selector:
    istio: ingressgateway # use istio default controller
  servers:
  - port:
      number: 80
      name: http
      protocol: HTTP
    hosts:
    - "gateway.springcloud.com"
---
apiVersion: networking.istio.io/v1alpha3
kind: VirtualService
metadata:
  name: gateway
spec:
  hosts:
  - "gateway.springcloud.com"
  gateways:
  - istio-system/gateway-gateway #can omit the namespace if gateway is in same namespace as virtual service
  http:
  - route:
    - destination:
        host: gateway
        port:
          number: 8060
---
然后再访问测试一下:
由于上面gateway中配置的是gateway.springcloud.com这上域名,所以需要在访问的机器上配一下host

使用istio发布注意点
在使用istio部署spring cloud kubernetes项目前记得将kubernetes的ribbon模式修改为service模式,默认是pod模式。
如果是pod模式的话,istio中对于virtualservice的配置是不会生效的
spring:
  cloud:
    kubernetes:
      ribbon:
        mode: service
svcb-service蓝绿部署
为了演示方便,这里对svcb-service进行蓝绿部署,准备好2个版本分别为v3和v5,不同的版本会输出不同的内容
其svcb-service的deployment配置文件如下:
apiVersion: apps/v1
kind: Deployment
metadata:
  name: svcb-service-v3
spec:
  replicas: 1
  selector:
    matchLabels:
      app: svcb-service
  strategy:
    rollingUpdate:
      maxSurge: 1
      maxUnavailable: 0
    type: RollingUpdate
  template:
    metadata:
      labels:
        app: svcb-service
        version: v3
    spec:
      containers:
        - image: ccr.ccs.tencentyun.com/spring-boot-cloud/svcb-service:v3
          imagePullPolicy: Always
          name: svca-service
          ports:
            - containerPort: 8070
              protocol: TCP
---
apiVersion: apps/v1
kind: Deployment
metadata:
  name: svcb-service-v5
spec:
  replicas: 1
  selector:
    matchLabels:
      app: svcb-service
  strategy:
    rollingUpdate:
      maxSurge: 1
      maxUnavailable: 0
    type: RollingUpdate
  template:
    metadata:
      labels:
        app: svcb-service
        version: v5
    spec:
      containers:
        - image: ccr.ccs.tencentyun.com/spring-boot-cloud/svcb-service:v5
          imagePullPolicy: Always
          name: svcb-service
          ports:
            - containerPort: 8070
              protocol: TCP
执行后测试一下,会出现一会儿输出V3一会儿输出V5的情况
访问截图如下:

通过观察请求结果我们可以看到,目前因为有两个版本的svcb-service,所以访问时也会轮询v3和v5两个版本的服务。其kiali监控图如下:
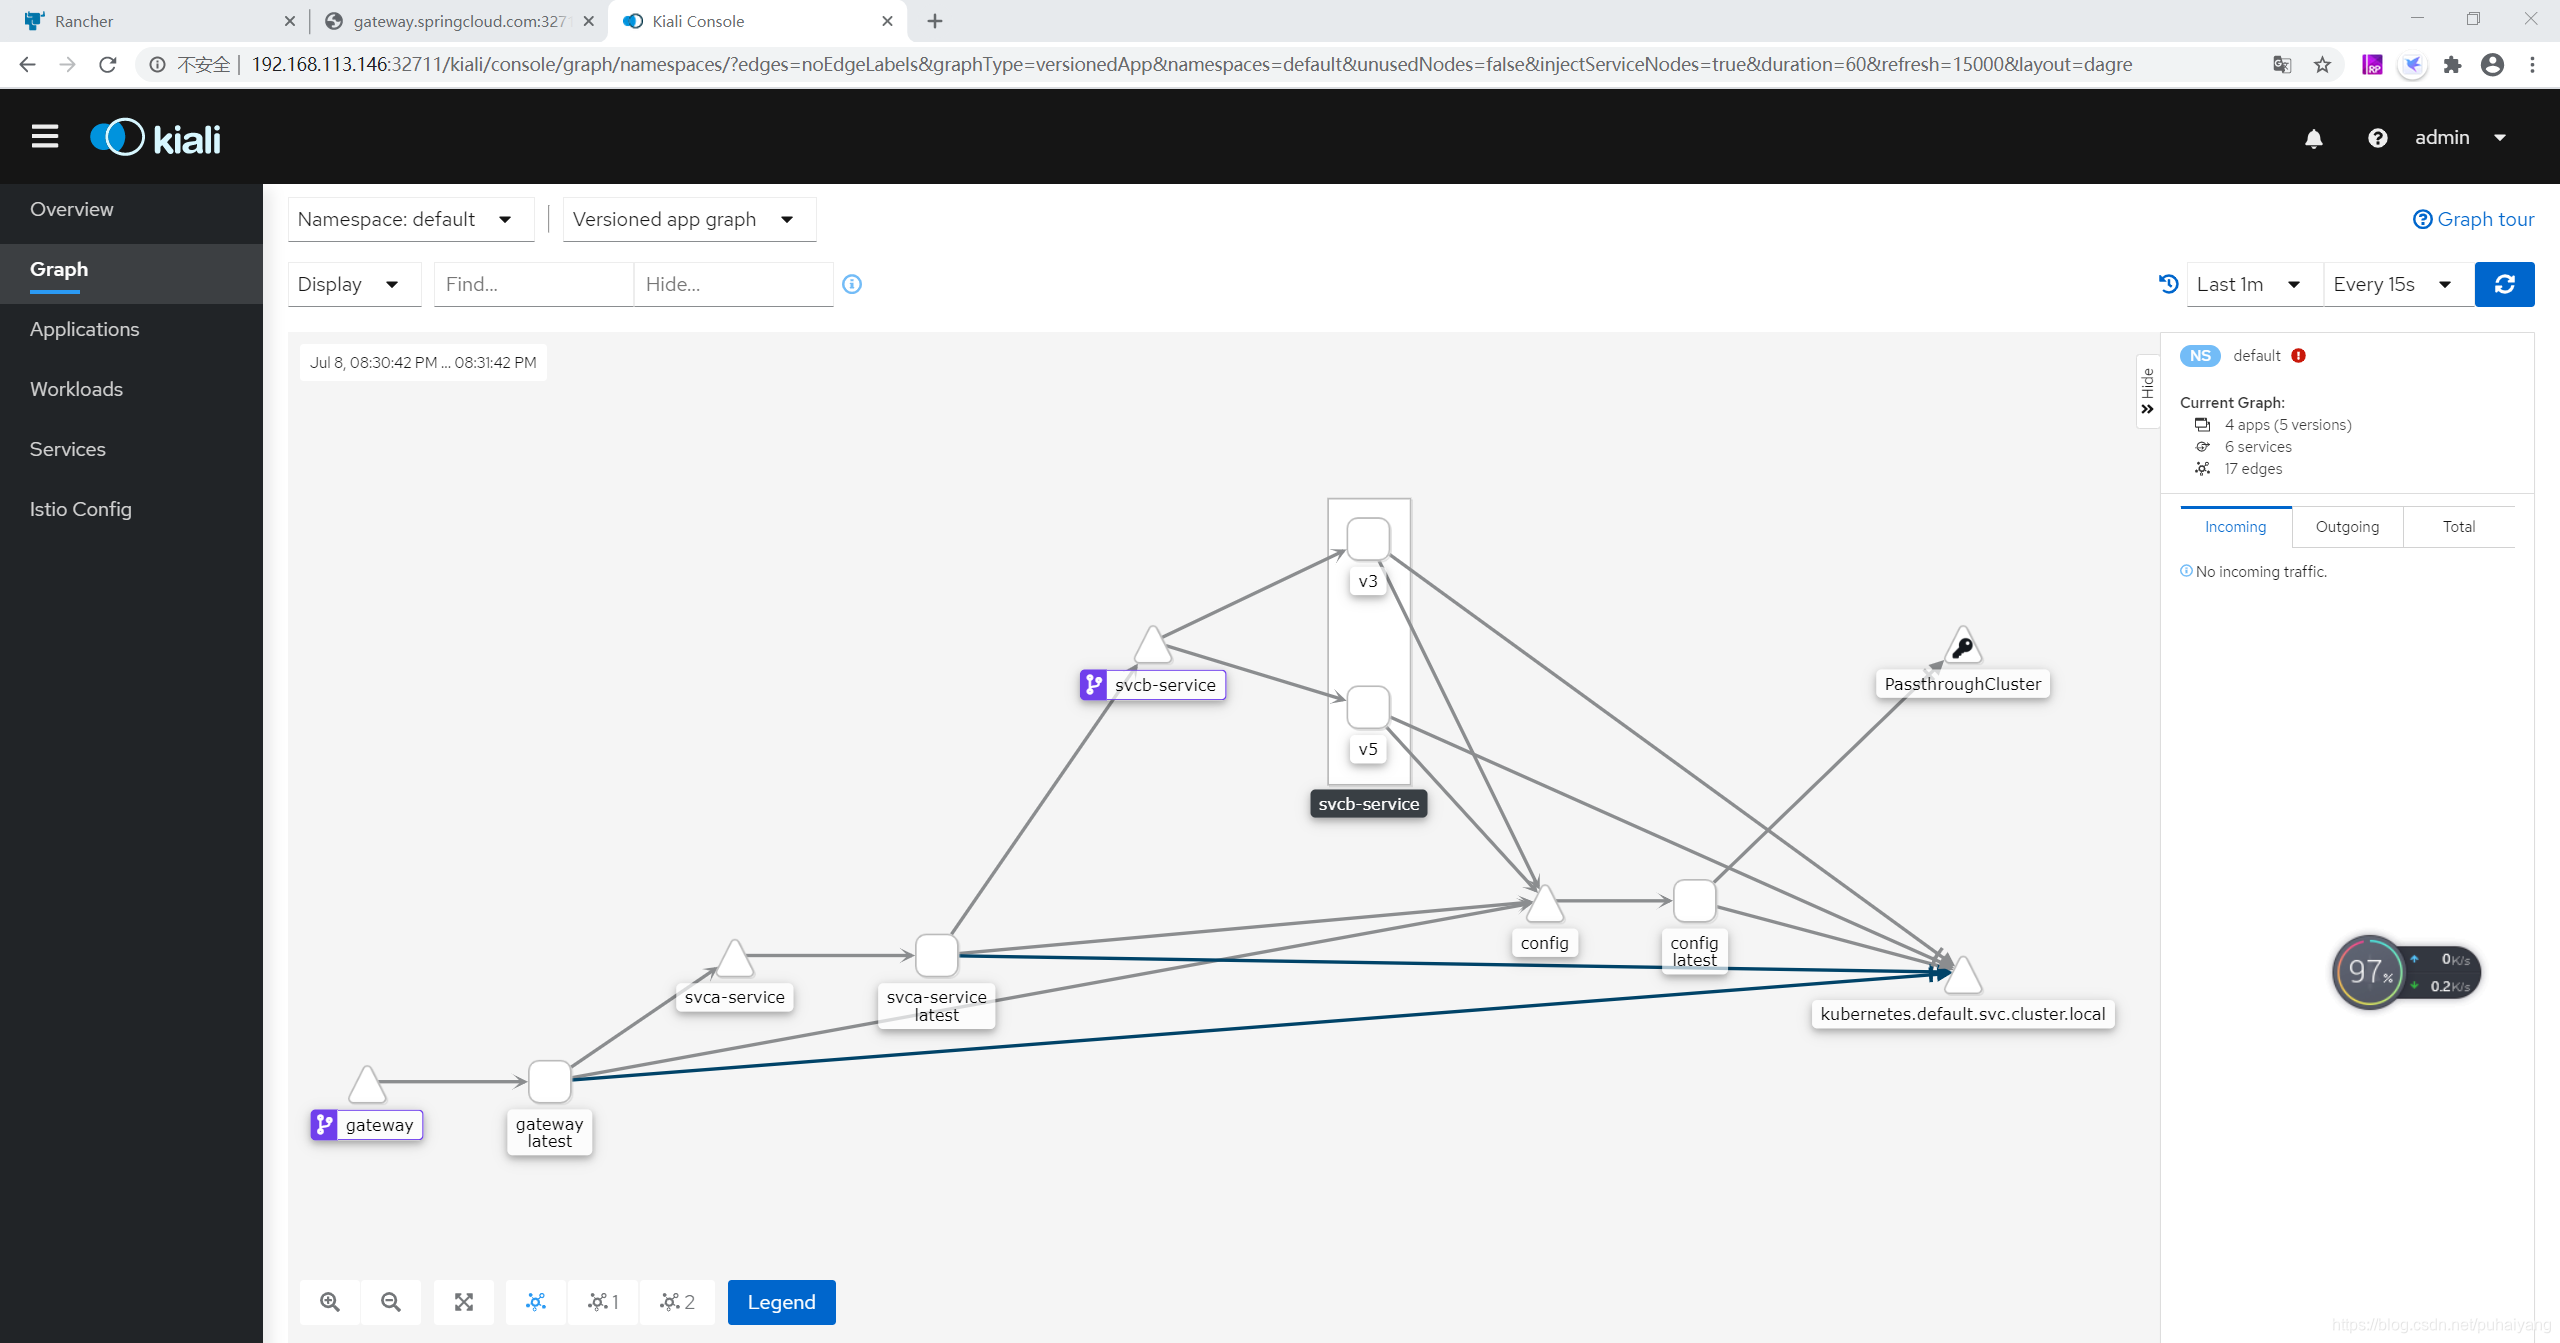

接下来加virtualservice,来让所有对于svcb-service的请求都发到v5版本上去
apiVersion: networking.istio.io/v1alpha3
kind: VirtualService
metadata:
  name: svcb-service
spec:
  hosts:
  - svcb-service
  http:
  - route:
    - destination:
        host: svcb-service
        subset: v5
---

apiVersion: networking.istio.io/v1alpha3
kind: DestinationRule
metadata:
  name: svcb-service
spec:
  host: svcb-service
  subsets:
  - name: v3
    labels:
      version: v3
  - name: v5
    labels:
      version: v5
上面的操作添加了一个VirtualService并绑定了一个DestinationRule,其VirtualService中让所有的svcb-service请求都转发到了labels为v5的pod中
此时再来测试一下效果

从图片可以看出,所有的请求全发到了v5版本的svcb-service中了

金丝雀/灰度发布演示
感觉所谓的金丝雀部署就是按照比例来进行部署,有了蓝绿部署金丝雀部署就简单了,直接来个配置文件修改virtualservice的配置就行了:
apiVersion: networking.istio.io/v1alpha3
kind: VirtualService
metadata:
  name: svcb-service
spec:
  hosts:
  - svcb-service
  http:
  - route:
    - destination:
        host: svcb-service
        subset: v3
      weight: 90
    - destination:
        host: svcb-service
        subset: v5
      weight: 10
---
apiVersion: networking.istio.io/v1alpha3
kind: DestinationRule
metadata:
  name: svcb-service
spec:
  host: svcb-service
  subsets:
  - name: v3
    labels:
      version: v3
  - name: v5
    labels:
      version: v5
演示一下:
从结果中可以看出,在加上金丝雀发布后,根据请求的比例差不多10%的请求被转发到了V5版本中,其余的请求转发到了V3版本中

最后想说
在体验了spring cloud kubernetes+istio之后最后想说,service mesh果然名不虚传

开源、云原生的融合云平台
更多推荐
 4
4 0
0- 0


 已为社区贡献9条内容

所有评论(0)